Main characteristics
Acrylic plastic is the basis for the design of dentures of this type
An acrylic prosthesis is an orthodontic structure that is used to restore the integrity of a dentition in which several or all units are missing. They are made from special acrylic plastic. The doctor selects the shape and shade of artificial teeth and gums for each individual patient.
If the product is made with high quality, then its appearance and functionality are preserved for many years.
Design features
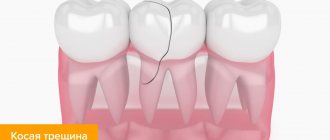
Acrylic dentures are different, but they all have a similar structure and consist of two main parts - gums and teeth. The main part imitates the gum area. Artificial teeth are attached to this part, the color, size and shape of which are selected individually for each patient. Dental units are made from acrylic or other materials such as ceramics.
Acrylic dentures can be installed on both the upper and lower jaw. The upper jaw attachment is attached to the palate by suction, like a regular suction cup. The prosthesis is attached to the lower gum in such a way that the part of the gum where there are no teeth serves as a support for the structure.
Manufacturing of removable dentures from plastic using injection molding
N.N. Abolmasov, A.E. Verkhovsky, O.K. Tarasenkov
Department of Orthopedic Dentistry with a course of orthodontics (head of the department - Doctor of Medical Sciences, Professor N.N. Abolmasov) State Educational Institution of Higher Professional Education "Smolensk State Medical Academy"
The traditional method of manufacturing removable dentures with a plastic base is rightfully considered to be the molding of hot-curing plastic in a dough-like state (polymer + monomer) into a pre-prepared plaster mold. In this case, upon completion of molding, no pressure is applied to the base material located in the mold. Therefore, it is not possible to compact the plastic in order to reduce its shrinkage during the polymerization period and eliminate the occurrence of pores (E. Ya. Vares, 1993). Polymerization shrinkage, according to M.A. Napadova (1978) reaches 7%, even with an optimal powder-liquid ratio. In addition, during the approach of the stamp and the counter-die, excess plastic is forced out between them and prevents their contact, forming a significant burr, or flash (E. Ya. Vares, 1986. At the same time, the amount of residual monomer remains at a significantly high level (6–8%) ". T.I. Ibragimov (2001) notes low thermal conductivity and long adaptation to prostheses due to the large thickness of the base. A prosthesis made of plastic can also be obtained by injection molding under high pressure - injection molding. One of these methods is the technology we used using Palajet/PalaXpress apparatus from Heraeus Kulzer, in which the molded material is introduced into a pre-closed cuvette through a casting channel (Fig. 1, 3, 4).In this case, only a certain amount of mass enters the cuvette, which is under controlled pressure during the entire polymerization process , which can significantly compensate for its shrinkage. For the manufacture of dentures by injection molding, acrylic plastics, polycarbonates, vinyl acrylates, etc. can be used. In addition, cold-curing plastics (self-hardening) can be used, which are considered less durable and contain a larger amount of residual monomer .
Rice. 1. System components for the manufacture of removable dentures by casting Fig. 2. A complete removable denture with plastic teeth is plastered in a position of central occlusion
Rice. 3 Set of wax pins (diameter = 7.0 and 3.0 mm) and their installation to create sprue channels Fig. 4. Opened cuvette after wax melting
The purpose of this work is to study the disadvantages and advantages of manufacturing removable dentures using plastic injection molding.
In Fig. 1 shows the components of a system for the production of removable dentures by injection molding, which includes the following devices and accessories: a pneumatic injection apparatus for the production of complete and partial removable dentures (the apparatus is automatically adjusted to a working pressure of 4 bar, and accessories are attached to it: a cuvette for polymerization , retaining rings and container for the cuvette, injection cylinder, apparatus for removing rings from the cuvette or puller), an automatically controlled apparatus for the polymerization of cold- and hot-curing plastics.
We manufactured 6 experimental complete and 4 partial removable plate dentures for the upper and lower jaws, as well as 14 dentures for patients (8 for the upper and 6 for the lower). Of these, 6 are partial and 8 are complete removable plate dentures. All patients are monitored at the dispensary. 6 patients who had been using complete and partial removable dentures for 1–2.5 years were invited for re-examination.
The functional diagram of this equipment is specially combined with the plastic processing method. To work with this device, we chose cold polymerized plastic. Cold polymerization was carried out at a working pressure of 2 bar, which is precisely regulated thanks to the built-in pressure relief valve. The polymerization process occurs automatically within 30 minutes and is controlled by a computer in accordance with the selected program.
The sequence of the technological process for the manufacture of dentures can be presented as follows: obtaining anatomical and functional impressions (casts), determining the central relationship of the jaws and setting the teeth (using glass or calotte) according to generally accepted methods. In Fig. Figure 2 shows a complete removable lamellar denture with plastic teeth, plastered into the middle anatomical articulator in the position of central occlusion.
For injection molding, a special collapsible cuvette is used, consisting of two halves held together by retaining rings. The inside of the cuvette is immediately lubricated with Vaseline, which will subsequently make it easier to remove the model from the plaster. A plaster model with a wax composition of the prosthesis base is cast (class III gypsum is used) in the center of the lower half of the cuvette (the lower half of the cuvette does not have pins, that is, pins). After crystallization of the gypsum, the inlet (7 mm in diameter) and outlet (3 mm in diameter) channels are filled with wax pins of the appropriate cross-section (Fig. 3). The surface of the plaster is coated with insulating varnish. Then the lower part of the cuvette is closed with the upper half, connected with compression rings, which are tightened only by hand (using a hammer is unacceptable!). The cuvette is placed on a vibrating table and filled with plaster in two stages to facilitate its subsequent opening. The first portion of plaster is poured just enough to cover the artificial teeth. After crystallization of the first portion of gypsum, its surface is covered with insulating varnish, and then the cuvette is filled with a second portion of gypsum to the upper edge of the cuvette.
Once crystallization is complete, the compression rings are removed and the cuvette is placed in hot water (approximately 80 °C) for 5 minutes. Then the cuvette is opened, the remaining wax is removed with clean, hot water (without adding chemicals) (Fig. 4). The surface of the warm plaster in contact with the prosthesis is insulated by applying two thin layers of insulating varnish. The surface of the teeth facing the base is processed with a diamond-coated cutter to improve subsequent adhesion to the plastic. For the same purpose, a special adhesive is used, which is applied twice to the treated surface of the teeth. After the first application, you need to let it dry for 60 seconds. After applying the second layer of adhesive, it remains active for 10 minutes, during which time the cuvette must be closed with compression rings and installed in the injection apparatus.
To produce removable dentures using injection molding, we used cold-curing plastic, which is a two-component “powder-liquid” system. Polymer and monomer are mixed in a 2:1 ratio. For a complete removable denture on the upper or lower jaw of medium size, 30 g of powder and 15 ml of liquid are required. Simple and reliable dosing is achieved by using a system in the form of two connected vessels, supplied with the plastic. The correct ratio of ingredients is achieved by filling a special vessel with powder and liquid to the same level (Fig. 5a). Liquid is poured into a glass mixing container, and then the appropriate amount of powder is added. The plastic is mixed with a spatula until it becomes a homogeneous mixture. Air bubbles are removed by tilting and simultaneously rotating the vessel.
Rice. 5a. Mixing PLA components in a special vessel in a ratio of 2:1 Fig. 5b. Liquid plastic is slowly poured into the prepared cylinder liner
For injection, special cups are used, consisting of a cylinder, a piston and a lid with a pipe. A plastic plunger is inserted into the bottom of the injection cup cylinder to form a container for the plastic dough. Liquid plastic is slowly poured into the prepared cylinder liner (Fig. 5b). It is necessary to ensure that the mixture does not flow down the inner wall of the cylinder liner, since sediment on the walls above the level of the mixture can lead to its heterogeneity. After loading the cylinder liner with plastic, its surface should become matte, which indicates full maturation, that is, readiness for injection molding. For injection, a metal injection cylinder is used, into which an injection cup with prepared “plastic dough” is inserted, and a lid with a pipe is placed on top, and the cylinder is hermetically sealed. The cylinder is then inserted into the injection apparatus, and using a lever, compressed air is supplied to the plunger of the apparatus, creating the desired pressure.
The moment the plastic cuvette appears from the outlet channel shows that it is completely filled (Fig. 6). After a certain amount of plastic comes out of the opening of the cuvette's outlet channel, it is closed using a valve. The filled cuvette is under pressure for 5 minutes, during which the plastic loses its fluidity and turns into a rubber-like state (Fig. 7a). After 5 minutes of continuous pressure, the cuvette is removed and placed in a special container (Fig. 7b).
Rice. 6. The appearance of plastic from the outlet channel of the cuvette
Fig.7a. The filled cuvette is under pressure Fig. 7b. The cuvette is removed and placed in a special container; polymerization of plastic in a special apparatus
Next comes the process of plastic polymerization, which we carried out under automatic control in a special apparatus (Fig. 7b). Tap water is poured into the polymerizer container, the Select button sets the desired temperature mode (for this plastic 55 ° C), and preheating is turned on, which is indicated by a flashing light. Stopping flashing (after about 15 minutes) indicates that the water has reached the set temperature.
Upon reaching the desired temperature, the container with the cuvette is lowered into the polymerizer container and tightly closed with a lid (Fig. 7b). The polymerization time is set on the device panel (for this plastic 30 minutes), and the Start button starts the process. The following indicators on the display indicate the normal progress of polymerization:
- heating indicator – a constant temperature of 55 °C is maintained in the polymerizer container;
- indicator of the presence of pressure in the polymerizer container;
- digital timer displaying the time remaining until the end of the polymerization process.
When the set time has elapsed, a beep sounds. The heater automatically turns off and the pressure in the polymerizer tank is “bleeded off,” after which the cuvette is removed and cooled to room temperature within 30–60 minutes. It is important to note that slow cooling, i.e., long exposure, provides better fit and accuracy of the prosthesis than a rapid cooling cycle. Compression rings are removed from the cuvette using a special device, which is opened using a plastic or rubber hammer. Do not use a metal hammer, as metal tools can damage the brass cuvette, which, in turn, can lead to errors during its subsequent use. After removing the prosthesis and separating the sprues, you can begin grinding and polishing it (Fig. 8).
Rice. 8; 8.1. Opened cuvette; The model is easily separated from the plaster...
In conclusion, it should be noted that based on the results of our research, the following conclusions can be drawn:
- the time of the laboratory process for manufacturing a prosthesis is reduced, according to preliminary data, by 2–3 hours compared to the traditional method;
- when removing the prosthesis from the ditch, there is absolutely no burr (burst), which, when cast in the traditional way, leads to an increase in the interalveolar height; the latter, in turn, leads to the fact that when applying a prosthesis, the doctor spends at least 20 minutes on correcting the occlusal surface, creating an almost new occlusal relationship, although this was not required when checking the design;
- the amount of plastic consumption is reduced due to precise dosage;
- the possibility of “underpacking” of plastic is excluded;
- good, accurate modeling of the wax base is transferred to the plastic practically without distortion;
- dentures are easier to grind and polish;
- A positive attitude of patients towards the manufactured prostheses was revealed.
Rice. 9; 9.1. Complete removable plate denture for the upper jaw after pre-treatment and after grinding and polishing
Clinical testing of removable plate dentures made by injection molding in the Palajet/PalaXpress apparatus from Heraeus Kulzer showed their higher functional and aesthetic value. A survey of patients revealed a significant reduction in the number of corrections and adaptation time after the application of prostheses. This, apparently, was also facilitated by the higher aesthetic qualities of the prostheses.
The described technology ensures their high accuracy, and at first glance, the absence of all types of porosity, and therefore a reduction in the amount of residual monomer, compared even with hot-curing plastics polymerized without pressure. But these assumptions need to be verified by laboratory studies. Continued research is planned to study residual monomer, adsorption phenomena and microbial invasion of removable dentures.
Article provided by the magazine “Dental Technician”
Types of acrylic dentures
There are several types of dentures, which differ in the number of teeth and the method of fixation.
Full
This type of prosthesis is prescribed to those patients who do not have a single tooth in their dentition. This design can be placed on the upper or lower jaw. It is attached in two ways:
- The alveolar process acts as a support
- The role of support is played by pins implanted into the jaw bone (in order for the structure to hold firmly, it is necessary to install at least four such pins)
Partial
Special metal elements are installed to secure an acrylic prosthesis.
This type of device is used in cases where the patient has lost several dental units located in a row. The structures are equipped with special metal elements that serve as fastenings. Fastenings can be made in the form of:
- Clamps with clamps
- Push button lock
- Beam structure
Conditionally removable
This type of prosthesis is so called because it can only be removed by a doctor if necessary. The patient cannot remove such a structure on his own.
The orthodontic appliance is removed when it needs to be cleaned. Conditionally removable dentures are installed for patients who have lost all teeth in the dentition.
"Butterflies"
A “Butterfly” type prosthesis is suitable for restoring a small number of lost teeth
This type of prosthesis received its name for its external resemblance to butterfly wings. It is prescribed to patients who are missing one or two teeth. The design is equipped with special hooks with which it is attached to adjacent teeth. To ensure that the device holds tightly and does not move, doctors recommend using special fixing agents.
The butterfly prosthesis is quickly made and easy to install. The patient can easily remove it for cleaning and disinfection.
Elastic pads are classified:
1)Depending on the nature of the material:
- acrylic
- polyvinyl chloride
- silicone or silicone
— polyphazene fluoelastomers (fluororubbers);
2) on polymerization conditions:
— high-temperature polymerization plastics (Eladent-100, Elastoplast, PM-01, Palaziv-62, Novus-TM);
— low-temperature polymerization plastics (Ortosil-M, Correntyl, Elekson and others).
Polyvinyl chloride materials resist abrasion better than acrylic and silicone materials, and adhere more firmly to the base than silicone compounds.
However, the presence of a plasticizer in polyvinyl chloride compositions causes the disadvantages inherent in plastics with external plasticization, migration of the plasticizer, and aging).
A number of authors provide data on the short term for elastic plastics retaining their primary properties, as part of dentures, from 4 weeks to 1-1.5 years (depending on the type of elastic material). The reason why elastic plastics age so quickly is thought to be that some ingredients (mainly plasticizers) are washed off by saliva.
But nowhere is the role of functional loads on this process indicated, which act on elastic materials repeatedly and with varying strength throughout the entire period of use.
The purpose of this work is to study the influence of loads on the aging process and the loss of the original properties of elastic cushioning materials.
Who are acrylic dentures indicated for?
Orthodontic structures made of acrylic are prescribed in the following cases:
- The patient is going to get fixed metal-ceramic dentures, but while they are being made, he will wear acrylic dentures so as not to walk without teeth
- The patient has lost his own teeth, but does not want to have fixed dentures or they are contraindicated for him
- The child has lost his baby teeth prematurely and their absence can lead to improper jaw formation. Temporarily wearing a removable denture will help correct the situation.
- The patient wants to eliminate aesthetic defects caused by missing teeth
Is it possible to repair a prosthesis at home?
An acrylic denture accidentally dropped into a sink or on the floor may crack or break. This can also happen when certain areas are under heavy load during chewing.
This is interesting: Features of modern wax modeling of teeth
The patient can repair a removable denture on his own, but not always. Breakage of the clasp (attached hook) cannot be done by a person without special skills, so in such a situation you need to contact a specialist.
Some patients try to glue a broken prosthesis with conventional adhesives (Moment, PVA, epoxy glue), which is strictly prohibited. After all, such compositions may contain toxic substances that are harmful to the human body and can lead to dermatitis or eczema.
When deciding to repair a prosthesis yourself, it is important to know the following:
- If you glue a structure with PVA, moisture can lead to its softening and rapid divergence of the seam.
- A rubber prosthesis is also not suitable for an acrylic prosthesis. The glue seam should not be elastic, but rather its rigidity is important. If a nylon prosthesis is glued together, the situation is the opposite.
- Using a large amount of hardener relative to the epoxy resin runs the risk of severe irritation of soft tissues from the alkaline amines contained in the hardener.
- Cyanoacrylate super glue can sometimes be used to temporarily repair acrylic dentures. It is advisable to use it when the patient has already made an appointment with a specialist for repair of the structure, but the day of the appointment will come in a few days, during which the patient does not want to go without teeth. In such a situation, super glue is the safest option relative to other types of glue. It is important to carry out gluing as carefully as possible. But the glue seam will also not last long, since it will constantly be in contact with moisture.
There are patients who tried to repair the structure by soldering it. Usually such manipulations are unsuccessful, regardless of whether the patient used polymethyl methacrylate for this.
If the clasp fits very tightly, or vice versa, too loosely, it is also better to entrust the correction of the prosthesis to a specialist. For the bravest patients who decide to do it themselves, it is recommended to use pliers for this. In this case, great caution and constant testing of the structure are important so as not to provoke the hook to break off.
The same applies if you want to avoid chafing. Some patients try to sand the surface of the base using sandpaper or a nail file.
If you are not sure that you will do it well, you should not do it. After all, you can ruin your prosthesis by trying to improve it at home. Repair and correction of a prosthesis is a matter for a specialist.
How are acrylic dentures made?
Orthodontic structures made of acrylic plastic are produced in the laboratory using a pre-made impression. This kind of work is not done quickly - it usually takes several weeks. Products are manufactured by injection molding.
The process of creating a denture consists of the following steps:
- The dentist takes an impression of the patient’s jaw, which will serve as a model for making a prosthesis.
- The impression is sent to the laboratory, and there the dental technician makes a plaster model of the future artificial jaw based on it.
- The finished plaster model serves as the basis for creating special wax rollers
- After this, the laboratory workers send the wax rollers to the dentist, and he calls the patient and asks him to bite the rollers with his teeth. This is necessary in order to determine the characteristics of the bite, as well as the height of the dental units. The more parameters are involved in the manufacture of the prosthesis, the more convenient it will be
- The doctor again transfers the rollers with dental imprints to the laboratory, where modeling of the wax base continues
- After the wax model is made, it will be handed over to the doctor again, and he will call the patient for a fitting. If the wax jaw fits well and does not cause any discomfort to the patient, then you can proceed to creating an acrylic structure. Otherwise, it is necessary to correct the shortcomings and re-try
- A prosthesis is made based on the wax model. The material used is liquid acrylic plastic, which is poured into a special mold
- After hardening, the prosthesis is removed from the mold, ground and polished, giving it an aesthetic appearance.
The grinding process completes the sequence of stages in the manufacture of the prosthesis
Research results.
Table No. 1 presents data from compression tests of 4 samples of the materials under study.
Table No. 1
Results of studies of materials in compression.
| No. | Fm, H | E, H/cm2 | Am, % | W, J |
| 1 | 54,3 | 0,0014 | 25 | 0,098 |
| 2 | 54,2 | 0,0013 | 27 | 0,0966 |
| 3 | 55,9 | 0,0018 | 26 | 0,1001 |
| 4 | 54,6 | 0,0013 | 23 | 0,098 |
Designations of quantities in the table:
E, N/cm2 – elastic modulus of the material of the samples under compression;
Fm, N – maximum value of the destructive force during compression;
Am, % – relative deformation of samples under compression;
W, J – work spent on sample destruction.
Looking at these data, model samples were analyzed, determining the change in volume under loads that caused their volumetric deformation by 20% and 40%, depending on the compression cycle, table No. 2.
Table No. 2.
| Number of compressions | After the 1st compression | After 100 compressions | After 200 compressions | After 300 compressions | After 500 compressions | After 800 compressions | After 1000 compressions | |||||||
| Measurement time after load removal | Straightaway | In 10 minutes | Straightaway | In 10 minutes | Straightaway | In 10 minutes | Straightaway | In 10 minutes | Straightaway | In 10 minutes | Straightaway | In 10 minutes | Straightaway | In 10 minutes |
| Group number | ||||||||||||||
| I | 0 | 0 | 0 | 0 | 0 | 0 | 0 | 0 | 0 | 0 | 0 | 0 | 0 | 0 |
| II | 0 | 0 | 0 | 0 | 0 | 0 | -0,28 ±0,18 | 0 | -0,3 ±0,1 | 0 | -0,3 ±0,1 | -0,05 ±0,15 | -0,33 ±0,13 | -0,1 ±0,1 |
| III | -0,8 ±0,2 | -0,55 ±0,35 | -4,25 ±0,75 | -3,4 ±0,2 | -5,1 ±0,3 | -4,05 ±0,35 | -5,9 ±0,5* | -5,15 ±0,55 | -6,5 ±0,3* | -5,8 ±0,4 | -7,2 ±0,6* | -6,5 ±0,5* | -7,75 ±0,35* | -7,2 ±0,6* |
*—differences between groups II and III are significant at p<0.001.
The results obtained show that the volume of the samples decreases on average by 7.2% ± 0.6% after 1000 compressions at a load that causes 40% deformation (Group III, samples No. 9 – 12).
Table No. 3
Effect of load on the mass of polymer samples
| Sample No. | Deformation size | Initial mass, M0, g | Weight after load, M1, g | Change in mass after load, ∆M1, g | Weight after 2 days in water, M2, g | Change in sample mass after soaking, ∆M2,g | Ah, mass % |
| Batch I | |||||||
| 1 | No deformation | 0,78360 ±0,00015 | 0,78360 ±0,00015 | 0 | 0,78480 ±0,00025 | 0,00120 ±0,00020 | 0,15 ±0,03 |
| 2 | No deformation | 0,79325 ±0,00015 | 0,79320 ±0,00015 | -0,00005 ±0,00015 | 0,79425 ±0,00022 | 0,00105 ±0,00018 | 0,13 ±0,03 |
| 3 | Deformation 20% | 0,78530 ±0,00015 | 0,78535 ±0,0002 | 0,00005 ±0,00015 | 0,78760 ±0,00026 | 0,00225 ±0,00021 | 0,29 ±0,05 |
| 4 | Deformation 20% | 0,78220 ±0,00015 | 0,78215 ±0,00023 | -0,00005 ±0,00015 | 0,78455 ±0,00028 | 0,00240 ±0,00023 | 0,31 ±0,06 |
| 5 | Deformation 40% | 0,78700 ±0,0002 | 0,77135 ±0,00036 | -0,01565 ±0,00105 | 0,77720 ±0,00043 | 0,00585 ±0,00027 | 0,76 ±0,1 |
| 6 | Deformation 40% | 0,78880 ±0,00025 | 0,77475 ±0,00039 | -0,01405 ±0,00095 | 0,78150 ±0,00044 | 0,00675 ±0,00029 | 0,87 ±0,12 |
| Batch II | |||||||
| 7 | No deformation | 0,79530 ±0,00018 | 0,79530 ±0,00015 | 0 | 0,79620 ±0,00019 | 0,00090 ±0,00016 | 0,11 ±0,03 |
| 8 | No deformation | 0,80755 ±0,00015 | 0,80760 ±0,00017 | 0,00005 ±0,00015 | 0,80830 ±0,00016 | 0,00075 ±0,00015 | 0,09 ±0,02 |
| 9 | Deformation 20% | 0,78655 ±0,00019 | 0,78650 ±0,00024 | -0,00005 ±0,00015 | 0,78790 ±0,00021 | 0,00135 ±0,00019 | 0,17 ±0,04 |
| 10 | Deformation 20% | 0,78175 ±0,00015 | 0,78165 ±0,00020 | -0,00010 ±0,00015 | 0,78255 ±0,00026 | 0,00090 ±0,00020 | 0,12 ±0,03 |
| 11 | Deformation 40% | 0,78710 ±0,00017 | 0,77035 ±0,00032 | -0,01675 ±0,00135 | 0,77550 ±0,00038 | 0,00515 ±0,00026 | 0,67 ±0,09 |
| 12 | Deformation 40% | 0,78490 ±0,00015 | 0,77265 ±0,00034 | -0,01265 ±0,00115 | 0,77625 ±0,00040 | 0,00460 ±0,00030 | 0,69 ±0,08 |
∆М1= М1 – М0;
∆M2= M2 – M1;
A – percentage change in the mass of model samples;
A = (∆M2/∆M1) 100%.
As can be seen from table No. 3, the water absorption of samples No. 3, No. 4 and No. 7, No. 9 is approximately 0.3% and 0.2% each; 0.1%, and for samples No. 5, No. 6 and No. 11, No. 12 – 0.8; 0.9 and 0.7 and 0.6%. From this it should be concluded that at higher compression (about 40 wt.%) the model samples are at the previous stage of destruction.
It is interesting to note that when samples are compressed to extreme deformation, the mass loss of the sample is an order of magnitude less than the absorption of water, which indicates an increase in the highest extreme reverse deformation (samples No. 5, No. 6 and No. 11 and No. 12) mass loss of the samples by approximately 0. 01 m is greater than the water absorption value. It can be assumed that in this case, bond breaks occur in the copolymer, that is, the polymer is destroyed.
Installation Features
Acrylic dentures are installed in several stages. Let's look at them.
- First, the doctor treats the teeth that will be adjacent to the prosthesis. To avoid the development of caries in those places where structural elements come into contact with the teeth, doctors sometimes install crowns
- Before placing the prosthesis, the doctor disinfects the oral cavity with a special antiseptic.
- While the design is in the manufacturing process, the dentist tries on the patient’s impression on the basis of which it will be made
- When the prosthesis is completely ready, the doctor puts it on the jaw and secures it. The method of attachment depends on the number of teeth present in the mouth and the type of structure
Since the denture should be as comfortable as possible and not cause discomfort, the patient has to come to the doctor several times for fitting.
Installation of the finished product is carried out in one session.
Contraindications to wearing acrylic dentures
Acrylic products are not suitable for all patients. They are contraindicated in the following cases:
- In case of individual intolerance to acrylic plastics
- With a strong gag reflex, excluding the possibility of wearing removable structures
- With severe atrophy of the jaw bone, when the gums cannot support the prosthesis
The most common problem in patients who wear acrylic structures is an allergy to acrylic.
A fairly common problem when wearing acrylic dentures can be a change in taste sensations when eating food.
It can be recognized by the following symptoms:
- The patient stops tasting food or experiences changes in taste
- The gums under the denture hurt, there is discomfort that does not disappear for a long time
- The gums itch, itch, and swell
- The mucous membrane becomes dry
- Inflammations appear in the mouth
- Increased salivation is observed
Advantages and disadvantages
Acrylic dentures have a number of advantages and disadvantages that anyone who wants to install them should definitely know.
| Advantages | Flaws |
| Suitable for people of any age | The structure, placed on the upper dentition, covers the palate, disrupting the perception of the taste of food |
| The product is easy to install and remove | Hard fasteners can rub the delicate mucous membranes of the mouth |
| Visually, the prosthesis is indistinguishable from natural teeth | Acrylic releases harmful chemicals that can irritate mucous membranes |
| When chewing food, the load is distributed evenly, since it involves the gums, and not just the supporting teeth | |
| The structures are inexpensive | |
| In the event of a breakdown, the product must be repaired |
Alternative options
In case of partial edentia, it is worth paying attention to such orthopedic solutions as, for example, soft Quadrotti prostheses or clasp-type structures, which are more compact in size.
In case of loss of all teeth, you can consider Akri-Free dentures with a slightly more rigid frame (than other soft plastics), designed to ensure proper distribution of the load during chewing. They are lighter and more comfortable to wear. Other suitable options include conditionally removable and fixed prosthetics using implants as supporting elements.
How to care for dentures?
One of the disadvantages of acrylic plastic is its porous structure, which becomes a breeding ground for pathogenic bacteria living in the mouth. Over time, they accumulate in the pores of the product, cause an unpleasant odor and become a source of infection.
Proper care of the prosthesis is the key to its comfortable and long-term use.
To avoid this, it is necessary to properly care for the device, wash, clean, and disinfect it in a timely manner.
- Clean the structure daily, morning and evening, with a toothbrush and toothpaste.
- Every time after eating, remove the denture and rinse it with water to remove any remaining food.
- At night, remove the device and place it in a special container with an antiseptic solution
- Avoid eating foods that are too sticky, hard or chewy
- Take your denture to your doctor every six months for professional cleaning.
Patients who wear conditionally removable structures should not remove them themselves. In order for the product to serve for a long time and maintain its original appearance, it is enough to maintain oral hygiene and visit your doctor several times a year for a medical examination and professional cleaning.
Answers to frequently asked questions
How to properly store the product?
At first, the patient undergoes adaptation to the prosthesis, so he should not take it off at night. After the adaptation period is completed, the device must be removed from the mouth before going to bed and placed in a special container with disinfectant liquid.
The container can be purchased at a pharmacy or specialty store.
What foods are best not to eat?
Patients wearing acrylic dentures do not need to make any significant changes to their diet. However, doctors recommend avoiding products that are too hard, which can damage the product, as well as products that are too viscous and stringy, sticking to the teeth.
Which designs are better - nylon or acrylic?
An alternative to acrylic products is nylon devices. To understand which ones are better, you need to study the pros and cons of each type.
| Nylon | Acrylic | |
| Material | Has high elasticity, allowing for a tighter fit to the gum | Quite hard material that does not adhere to the gum so well |
| Form | Due to its softness, nylon may become deformed during wear. | The structure retains its original shape and does not deform |
| Structure | Nylon has a dense structure, so it does not accumulate odors and microorganisms | The structure of acrylic is porous, so it easily accumulates foreign odors, and also becomes a favorable environment for the development of microbes |
| Harmfulness | Non-toxic | Moderately toxic |
| Price | Has a fairly high cost | Has a low cost |
| Fixation | Additional use of cement or glue is prohibited | Possibility of using cement or glue to improve the quality of fixation |
Materials and methods:
In order to study this issue, studies were carried out on model samples of elastic materials for compression and to determine changes in their dimensions and mass due to the action of loads on them.
According to the instructions for using materials, model samples were made. Dimensions of model samples: length – 15 mm, width – 10 mm, height – 5 mm. The test program was carried out on UTS-10 and UTS-100 machines (Germany).
Tests were carried out in accordance with the provisions of the GOST-4651-98 standard. As is known, the polymer is heterogeneous in its structure; there are weak (defective) and stronger areas in it.
Under load, weak points are stress concentrators, so local micro-chain breaks occur in the polymer, leading to the formation of microcracks and microvoids approximately 2-20 mm in size, which contribute to an increase in the free volume of the sample. Depending on the magnitude and duration of mechanical forces, the polymer is subject to deformation and destruction. Note that with reversible deformation, after eliminating external forces, the original shape of the sample is completely restored - elastic or elastic deformation. The stronger the external mechanical impact, the more significant the change in the structure and properties of polymers.
To determine the limit of reversible deformation, 5 samples were made from various elastic materials: N1 from PM-01, N2 from PM-S, N3 -, N4, N5-.
In order to study and analyze the influence of loads on the dimensions and weight of elastic cushioning materials, 12 model samples were made, 3 from each material under study. Dimensions of model samples: length – 15 mm, width – 10 mm, height – 5 mm. Everyone was divided into three groups according to the degree of expected pressure. The first group consisted of 4 model samples (No. 1, No. 2, No. 7, No. 8), which were not loaded. The second group consisted of 4 model samples (No. 3, No. 4, No. 9, No. 10), which were subjected to compression, causing their 20% volumetric deformation. The third group consisted of 4 model samples (No. 5, No. 6, No. 11, No. 12), which experienced compression causing their 40% volumetric deformation.
The load acted vertically on the model samples.
Compressions were carried out using a hand press, and the load was transmitted vertically by pressing down the samples with the lid of a metal mold until it tightly touched the stand with the samples located in it. In this case, the model samples were compressed along the height h by 20% in the second group and 40% of their volume in the 3rd group. All samples of the 2nd and 3rd groups were compressed 1000 times. They were measured immediately after removal of the load and after 1 hour. The measurements were carried out with a micrometer MK 0-25mm, DST 6507-60 with an accuracy of 0.01 mm.
In parallel, the influence of loads on the mass and porosity of model samples was studied.
Before compression, all 12 samples were weighed on electronic laboratory equal-arm scales of the second class, model VLR - 200 g, DTS - 19491-74 (weighing error, which is allowed, ± 0.00015 g) and their initial mass was determined - M0. Then we calculated the change in the mass of the model samples after weighing - ∆М1, ∆М1 = М1 – М0, where М1 is the mass of the sample after weighing. To determine the porosity of model samples after loading, they were kept for 24 hours in bidistillate, after which they were thoroughly wiped with absorbent paper and weighed. The mass of model samples after being in water is M2. Then we found the change in the mass of the samples after soaking ∆M2 = M2-M1.
After that, the percentage change in the mass of model samples was calculated - A, where A = (∆M2/∆M1) 100%.