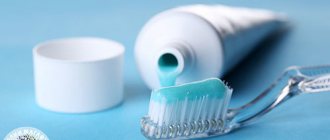
Stand for toothbrushes made of plastic bottles
Hello - hello everyone!
Today we will make a beautiful and convenient stand for toothbrushes! Since glasses are no longer relevant, they are a thing of the past, so to speak.
For production we will need:
- Plastic bottles;
- Hacksaw for metal;
- Sandpaper;
- Hot melt adhesive;
- Stationery knife;
- Scissors;
- Aerosol paint;
- Braid.
Step 1.
We take a one and a half liter plastic bottle and cut off the upper, conical part with scissors. Then, cut off the bottom of the bottle. Look carefully at the photo: here is an important aspect - you need to cut off the lower part so that it continues the bend of the conical (upper) part of the bottle. Therefore, a bottle of this particular shape is perfect for this craft.
Step 2.
Apply hot glue to the inner surface of the lower (wide) part of the cone and glue it to the lower part.
Step 3.
Now we need a five-liter plastic bottle. We take a hacksaw and saw off the neck of the bottle, leaving a little straight part of it after the cap (3-5 millimeters). We perform the same procedure with two bottles with regular necks. After that, we treat the sawed areas on the necks with sandpaper, removing shavings and sharp edges.
Step 4.
We attach the necks to the side, conical part of the previously obtained vessel and trace them in the places you need with a marker, thereby marking the places for gluing them.
Step 5.
Using a stationery knife, cut out the intended holes and glue the necks into them using hot glue.
Step 6.
Having previously degreased the surface of the stand, paint it.
Step 7
After the paint has dried, you can decorate it with braid.
That's it, now you can remove the glasses for toothbrushes from the bathroom, replacing them with this wonderful stand!
Source
DIY toothbrush holder
How to make a super simple toothbrush holder and clean your bathroom sink. If your bathroom doesn't have enough space, even something as small as a toothbrush can feel like it's taking up a lot of space.
Hanging a toothbrush holder on the wall helps clear up space, or you can hang it inside a cabinet to hide your brushes from view.
Rules for storing a toothbrush
Many people are unaware that they have been storing their brushes incorrectly all this time.
Often in the bathroom you can see brushes lying carelessly on the shelf, touching it and other objects with their bristles, or leaning against each other while in a stand. These storage methods are very unhygienic, since a large number of bacteria located within the apartment and ventilation settle on the bristles. It is these microorganisms that then enter the oral cavity, stomach and intestines, and can become a source of centralized infection.
How to properly store your toothbrush? This question is asked by every person after visiting the dentist. It is worth remembering a few simple rules that will help you keep your home clean and avoid infections:
If you follow these simple rules, your brush will last you longer. Infections of the oral mucosa are very difficult to cure, which is why you need to protect yourself as much as possible from their occurrence. Oral hygiene starts with a toothbrush.
Features and Benefits of Brush Holders
The holder helps keep the toothbrush and its bristles perfectly clean. These measures prevent the growth of bacteria. Modern brush stands store brushes vertically to allow water to drain and the bristles to remain clean and dry.
The toothbrush can be placed in the cabinet or on the sink. But in this case, it will remain wet and will come into contact with other surfaces. This will lead to an active increase in bacteria on the bristles, which will then spread into the oral cavity.
Another benefit of toothbrush holders is their versatility. There are various types of models on sale, equipped with free space for toothpaste. There are models with space for a men's razor. This is convenient and saves space, which is especially important for a small bathroom.
Such devices also carry an aesthetic load - the function of decorating the bathroom. If until recently an ordinary glass was used to store dental supplies, standing on the sink or attached to the wall, now the bathrooms in many homes are decorated with spectacular and bright stands.
Homemade toothbrush tablet for travel
Years ago, a mom told me how to create a travel toothbrush holder out of a hand towel.
I was so excited, I quickly made my own and have been using it ever since. It's perfect because you can customize how many toothbrush slots you need, it's big enough for a large family, and it's washable!
I wanted to share this simple sewing project with you all, but I kept forgetting to take pictures of the progress. I recently decided to go ahead and make a new one that was a little bigger to accommodate our growing family. Perfect time to take photos and encourage you to create your own toothbrush storage tablet!
As you can see, the new towel I chose is much longer.
Materials needed: – 1 hand towel – ribbon – thread – sewing machine
Instructions:
1. Fold the hand towel about 2/3 of the way up and secure it.
2. Sew along the folded edges to create a long pocket.
3. Fold the towel in half to find the center of the long side and insert a pin into the center to mark your spot. Then measure 1 1/2″ on either side of that center pin and press it against the mark.
4. Sew a straight line into the pocket from each of these pins to create a 3-inch center pocket for toothpaste and dental floss.
5. Next, depending on the size of your toothbrushes, sew straighter lines on either side of the center pocket to accommodate your toothbrushes.
6. Now you need to add some ribbon to one of the outer edges to tie the toothbrush holder together when it is folded. First, cut 30 inches of tape. Then fold the ribbon in half and pin half of the back of the towel along the edge that feels most natural to you. (Naturally, I rotate the toothbrush holder from right to left, so my ribbon is on the left edge.)
7. Sew on the ribbon and test the toothbrush holder!
Whenever we travel, we use this toothbrush holder and just throw it in my bag. Because it's a towel, it will absorb any water that might fall on it near the sink. Once we get home, we simply take out all the toothbrushes and toothpaste and throw them in the washer. I truly think you will love yours as much as I love mine!
Source
Important points when choosing a toothbrush stand
It is often found that several toothbrushes are in one glass, touching each other. This is unsafe for dental and oral health. Cups with holes for different brushes are also not a solution. The brushes are located in close proximity and are not protected from germs and bacteria.
The best option would be to buy a separate glass for each family member. It is advisable to wash the brush stands daily. It is necessary that they are made from environmentally friendly materials.
When sharing a bathroom, it is important to keep the toothbrush in a closed cup and at a distance of at least two meters from the toilet. If you purchase a stand with a lid, it will additionally protect the brush from negative factors.
How to sew a cosmetic bag for the bathroom?
This item will definitely come in handy for women. After all, in cosmetic bags you can store not only cosmetics, but also hairspray, comb, brush, deodorant and other similar things.
You can put this thing on a shelf in the bathroom so you can do your makeup in the morning and not have to look for personal care items throughout the apartment. They will be stored in one place.
Before sewing a cosmetic bag, you need to prepare this with your own hands:
- pieces of fabric, you can take three types special for patchwork;
- fabric for lining;
- glue web;
- self-assembling zipper;
- water-soluble marker;
- fabric for lining;
- 150 grams of needle-punched filler.
Let's start cutting. Fold the parts as follows so that they are arranged in 5 layers. They should be round, with a diameter of 14 cm. First comes the lining fabric, then the adhesive web, then the filler, put another adhesive web on top of it, cover it all with the main fabric on top. Iron this multi-layered “sandwich” with an iron, but be careful not to get any cobwebs under the sole, otherwise it will melt. Using a ruler and a water-washable marker, mark the stitches on the fabric and make these stitches on a machine using metallized threads. In this case, you need to loosen the pressure of the foot by a third of the norm so that the thread does not gather. Now you need to place a round object on this blank or draw a circle with a compass so that its diameter is 12.5 cm. Here's how to sew a cosmetic bag next. Cut bias strips of fabric 3.5 cm wide. Apply the resulting bias tape to the edge of the round piece, cutting it halfway, and the seam will be 6 mm wide.
Preparatory stage
I was lucky that I already had a piece of wood in my garage that looked pretty good. I marked it according to the required dimensions, and then my husband sawed off the required part. This gave me a nice wooden base for my cups.
Bill Gates: After the Covid-19 pandemic, the world may face two threats
Users are confused by an ordinary photo in the forest: is it a dog or a person?
Soft and fluffy: a pet as a psychologist for a child
I decided to paint the wood white and then lightly sand the board. I wanted the base to look a little worn. I waited for the paint to dry. Then I went over the board with sandpaper.
I also decided to add a little accent to the wood using a wax paper transfer technique. I had to spend quite some time printing my chosen image onto the wax paper because it was stuck in the printer and wouldn't come out.
First I wrote Brush in a font I liked. I then stamped the mirror image onto wax paper. I knew it was too thin to fit through the printer properly, so I glued it on top of a regular sheet of paper. The problem was that the printer struggled to grip the slippery wax paper, causing it to tear and wrinkle. But in the end everything worked out for me.
Narrow noses, platforms - the works of designers show the fashion trends of the season
ASUS plans to release a miniature flagship phone Zenfone Mini
The housewife set her own dress code, but not everyone liked it
Then, carefully, without touching the ink, I placed a piece of wax paper face down on the wood and taped it in place.
Using a blunt object, I rubbed the image. At the same time, it was imprinted on the tree. So a unique inscription appeared on my board, which significantly improved its appearance.
Types of structures and methods of fastening
In the manufacture of holders, different materials are used: plastic, silicone, metal, ceramic, porcelain, acrylic, steel and rubber.
Products also vary in size, shape, design and price. It all depends on preference. If there is a small child in the house, the best solution would be to choose a product made of plastic, silicone or rubber. These materials are used to create cute shapes of animals and fairy-tale characters. Moreover, they are absolutely safe. But easily breakable items should be excluded.
Depending on the type of fastening, there are two types of brush holders:
Tabletop. Placed on the sink, shelf or nightstand. In this case, a wide and stable base is necessary so that the device does not fall. Tabletop options are usually larger and designed for a larger number of people. They are created from many materials, including metal and ceramics. The advantage of this design is that it is easy to clean.
Wall-mounted. Such devices are fixed to a vertical surface using screws or suction cups. The second option is applicable for light rubber or plastic products. A glass for toothbrushes with a suction cup can be attached to a wall made of tiles, plastic and glass. In other cases, screw fastenings are used.
Hanging holders can be placed anywhere in the bathroom without getting in the way. This is no small advantage. There is also a drawback. Hanging toothbrush cups are difficult to clean. First you need to remove the holder, then wash it and re-attach it to the wall.
Bathroom screen - types of designs and selection of sizes. 125 photos of optimal ideas
Bathroom set: stylish accessories and selection of ideal solutions for different design options (70 photos)
- Bath mat - 65 photos of the ideal choice of a stylish set and selection rules
Necessary materials
To make such convenient cups for the bathroom, I needed to prepare the following materials:
- A piece of wood (you can choose the size yourself depending on how many cups you need).
- Glass Mason jars. I used 3 pieces (one for each of my babies). Here you can also proceed from your own needs.
- Clamps - one for each jar.
- Drill.
- Screws.
- Metal rings.
- Screwdriver.
- Paint. You can also use stain.
- Sandpaper.
- Wax paper.
Bathroom Storage Ideas
Let's look at the simplest ones first, and then look at some in more detail. You don't need to buy expensive equipment to clean up your bathtub. You can get a place to store and dry towels if you take:
If the hooks are metal with holes, then first drill holes in the wall, insert dowels into them, and screw in self-tapping screws. If the hooks have no holes, such as plastic ones, then glue them on. Tie a rope to the 2 outer hooks, pass it through the central hook and you can hang towels and admire the order in the bath.
There are hooks on sale that screw into a hard surface; this idea for storing towels will certainly come in handy. Screw them into a wooden plank and you can hang textiles so that they are always at hand. If you have a treated board, attach it to the wall. Glass jars will come in handy. Wash them, remove labels. Put on metal clamps, which must first be attached to the board with self-tapping screws on one side. Here you can store glasses, cotton pads, cotton swabs, cosmetic brushes and other small items that will now never get lost. If you have small metal baskets, they will also create a convenient storage section. They can be placed one on top of the other, if this is not provided, then each is attached to the wall. Roll up the towel, tie the cloth napkins with a ribbon, and place the toilet paper in another basket. This is the order you will achieve in the bath. If the two-story vase for storing fruit is already quite boring, let it play a different role. On the lower tier you will place glass jars in which you will place cotton wool, disks, and sticks. There is a place on top for microfiber cloths, with which cleaning will be quick and easy. To keep soap from storage and sea salt for baths, place these hygiene products in glass jars with metal lids. It is good to store sponges in the same container, but they must first be thoroughly dried.
To keep glass jars streak-free, wash them with water and dish soap. Wipe metal lids with a cloth until shiny.
By the way, the faucet in the bathtub will also shine like new if you polish it with a microfiber cloth or other similar soft material.
Board design
Before adding the clips, I attached a D-ring to the back of my board so it could be safely hung on the wall.
Next, I started making the most difficult part - the clamps for the cans. They may seem easy to attach since you only need a drill and screws. However, this was truly no easy task. I had to call my husband for help. Things moved quickly with him. We evenly distributed and screwed the clamps.
There are carvings on the top of the Mason jars. Therefore, they adhere perfectly to such a metal ring. I just then tightened the clamps around the cans tighter with a screwdriver. All I have to do is attach everything to the wall and put toothbrushes, toothpaste and other little things my kids use in jars.
Coasters for children
Do children need toothbrush holders? Absolutely yes. Especially if there are small children in the family. After all, a child may forget that he needs to brush his teeth twice a day. And his parents will have to constantly remind him. And some children do not like this procedure at all.
To make brushing your baby’s teeth more desirable, experts advise to interest and captivate the child - buy him a comfortable, attractive and bright stand.
And of course, choose an interesting, funny drawing. For example, beautiful glasses for toothbrushes with images of cartoon characters and children's fairy tales. Or buy your baby a holder in the shape of a dolphin, duckling, or Mickey Mouse. If you use your imagination, you can make a stand for a baby brush yourself.
Original solutions for storing brushes
You can store toothbrushes not only in a cup or container. If you show imagination and ingenuity, you can find interesting and profitable solutions. Storage for hygiene products can be made from any available material: an old towel, hooks, magnetic tape, clothespins and even sprats boxes.
You just have to give free rein to your imagination, and you can make any decisions come true. It is necessary to take into account the basic requirements for such a “storage”:
- The brush storage container should be easy to clean,
- be resistant to moisture and not susceptible to mold formation,
- the accessory should be convenient and easy to use so that no one gets hurt on the decorative elements,
- perform the function of protecting brushes from contact with each other and the environment.
For a child
Small children often do not like to wash their face and brush their teeth; they are capricious, cry and refuse. If you choose the right brush holder for your baby, you can turn this activity into an exciting journey and a fun game. The child will look forward to the morning and evening to go to the bathroom.
Children are very fond of space aliens, interplanetary ships and the conquest of alien galaxies. You can take an old cup for hygiene products, arm yourself with bright acrylic paints, and together with your child, turn a boring holder into an intergalactic vessel. Draw stars and planets, attach unusual stickers, and let your brushes be passengers on this ship.
For little princesses there is another option. Take an image of your favorite cartoon character, print it out, stick it on a cup and secure it with tape on top. Seeing his idol every morning, the baby will be more willing to brush his teeth.
You can also buy special protective caps in the store, which are made in the shape of animal heads or soccer balls. They're easy to clean and handle, and young explorers can play with them in the bathroom while they brush their teeth.
Do it yourself
If the store does not have a glass of the desired color or you want to work creatively, you can make the product yourself.
And if you involve a child in this venture, next time he will happily run to brush his teeth. To make a brush stand you will need a regular plastic bottle or shampoo jar.
- Take a plastic bottle or an empty shampoo jar.
- Remove the label and rinse well so that there is no foam. You need to cut off the neck of a plastic bottle.
- Make a mark for fastening with a pencil. It will be larger at the back, where the hook is located. Using scissors, cut along the mark you made.
- We fix a hook for a glass on the bathroom wall.
- We make holes with a hole punch, scissors or a knife.
- We decorate the stand to your taste - with beads, stickers, rhinestones, stones. Using varnish, you can decorate it with a beautiful pattern - as much as your imagination allows.
- We fix it on the wall.
A toothbrush holder is an important device for any family. This is a necessary hygiene product and an element that decorates the interior of the bathroom.
Touch mixer - installation and features of using non-contact and touch models (115 photos)
Bathroom stopper: popular applications and selection of optimal materials (110 photos)